New Homeowner Guide: How to Set Up/Program your Hunter Irrigation System!

As a new homeowner, setting up and programming your Hunter irrigation controller can seem daunting, but it doesn't have to be. With a few simple steps, you'll be able to set up your watering schedule and keep your lawn and plants healthy and green all season long.
Step 1: Set the Date/Time
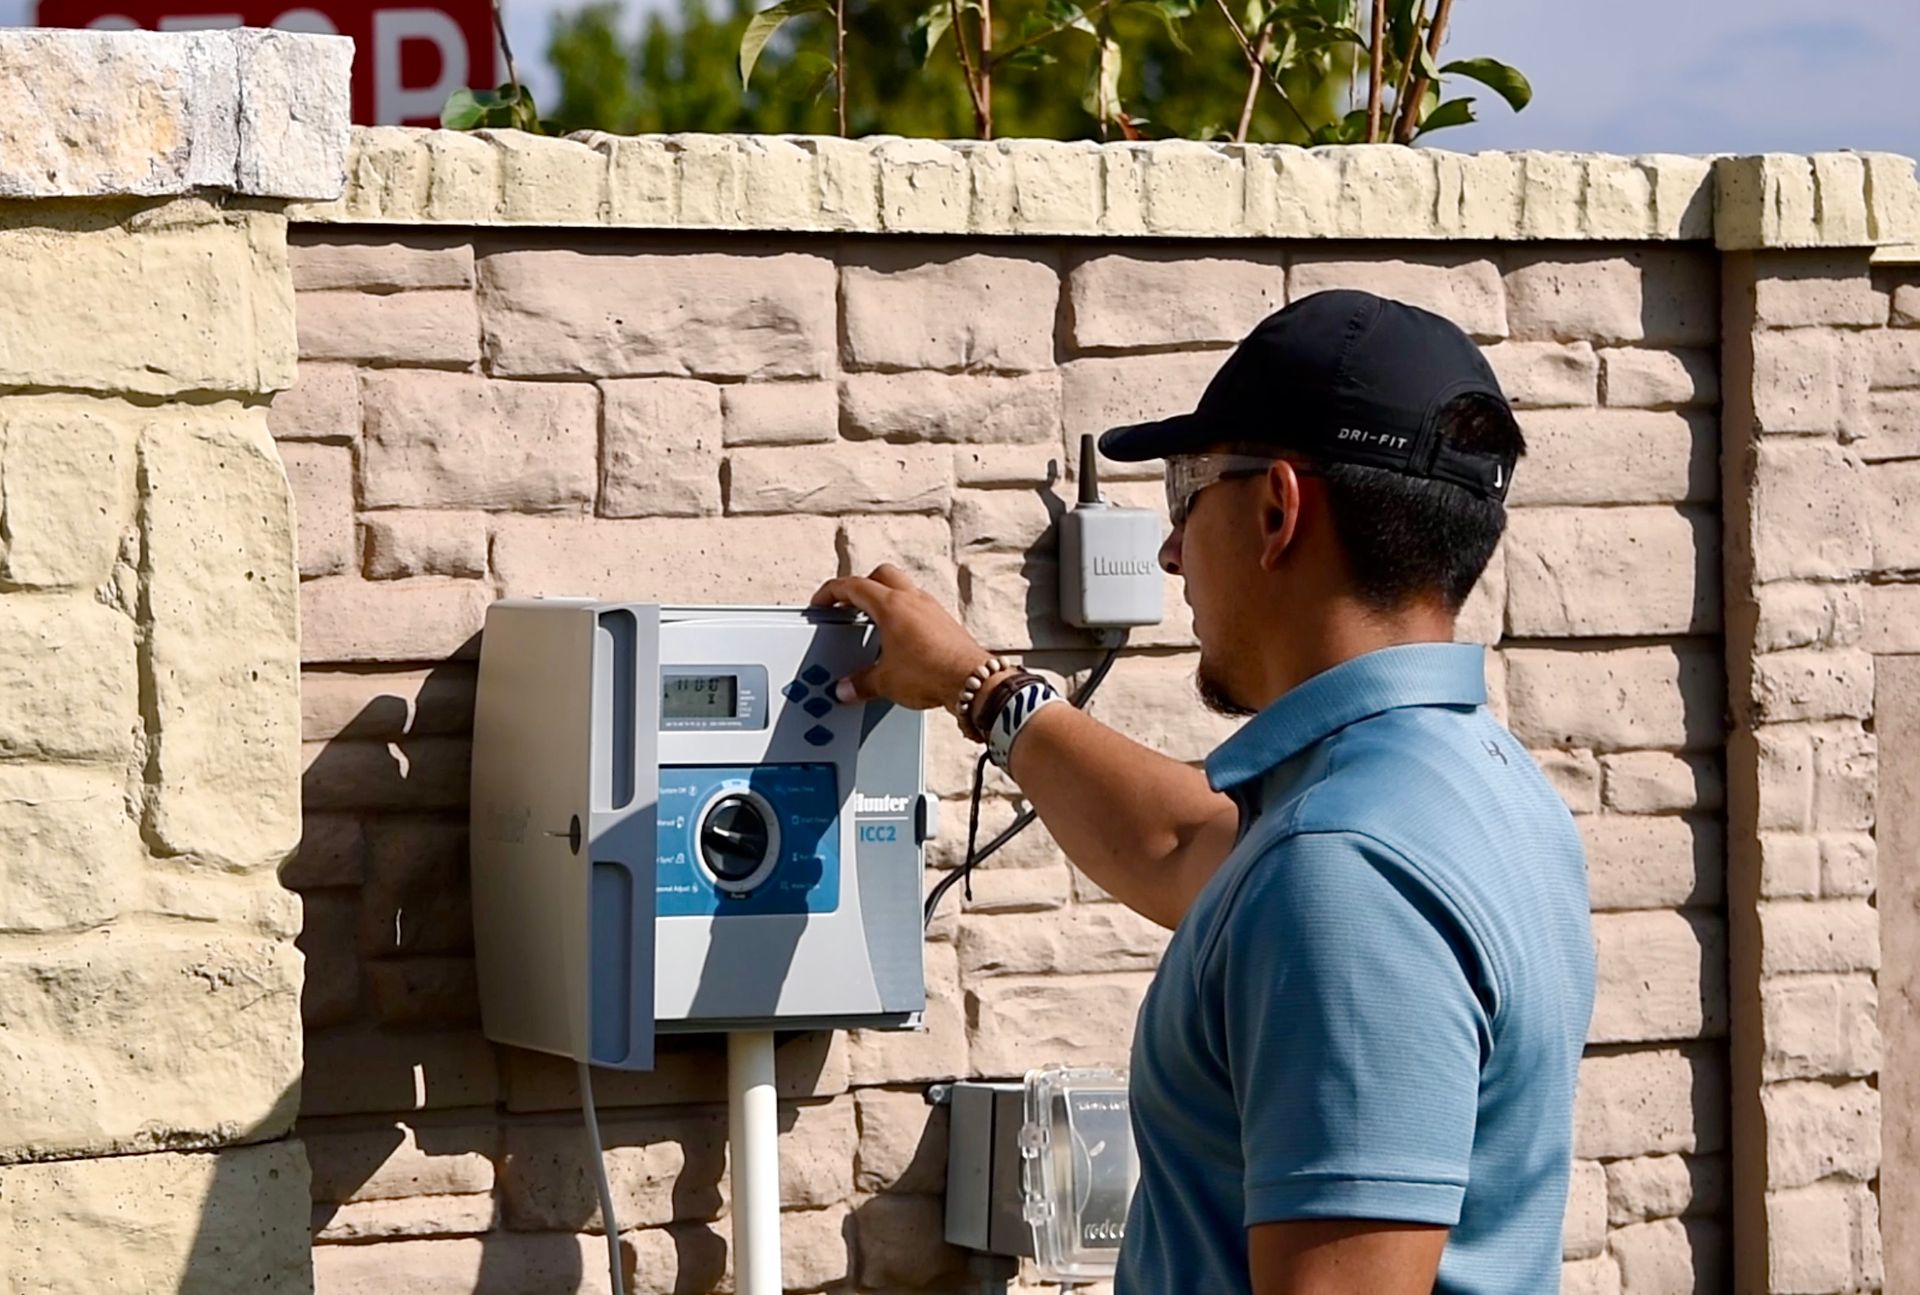
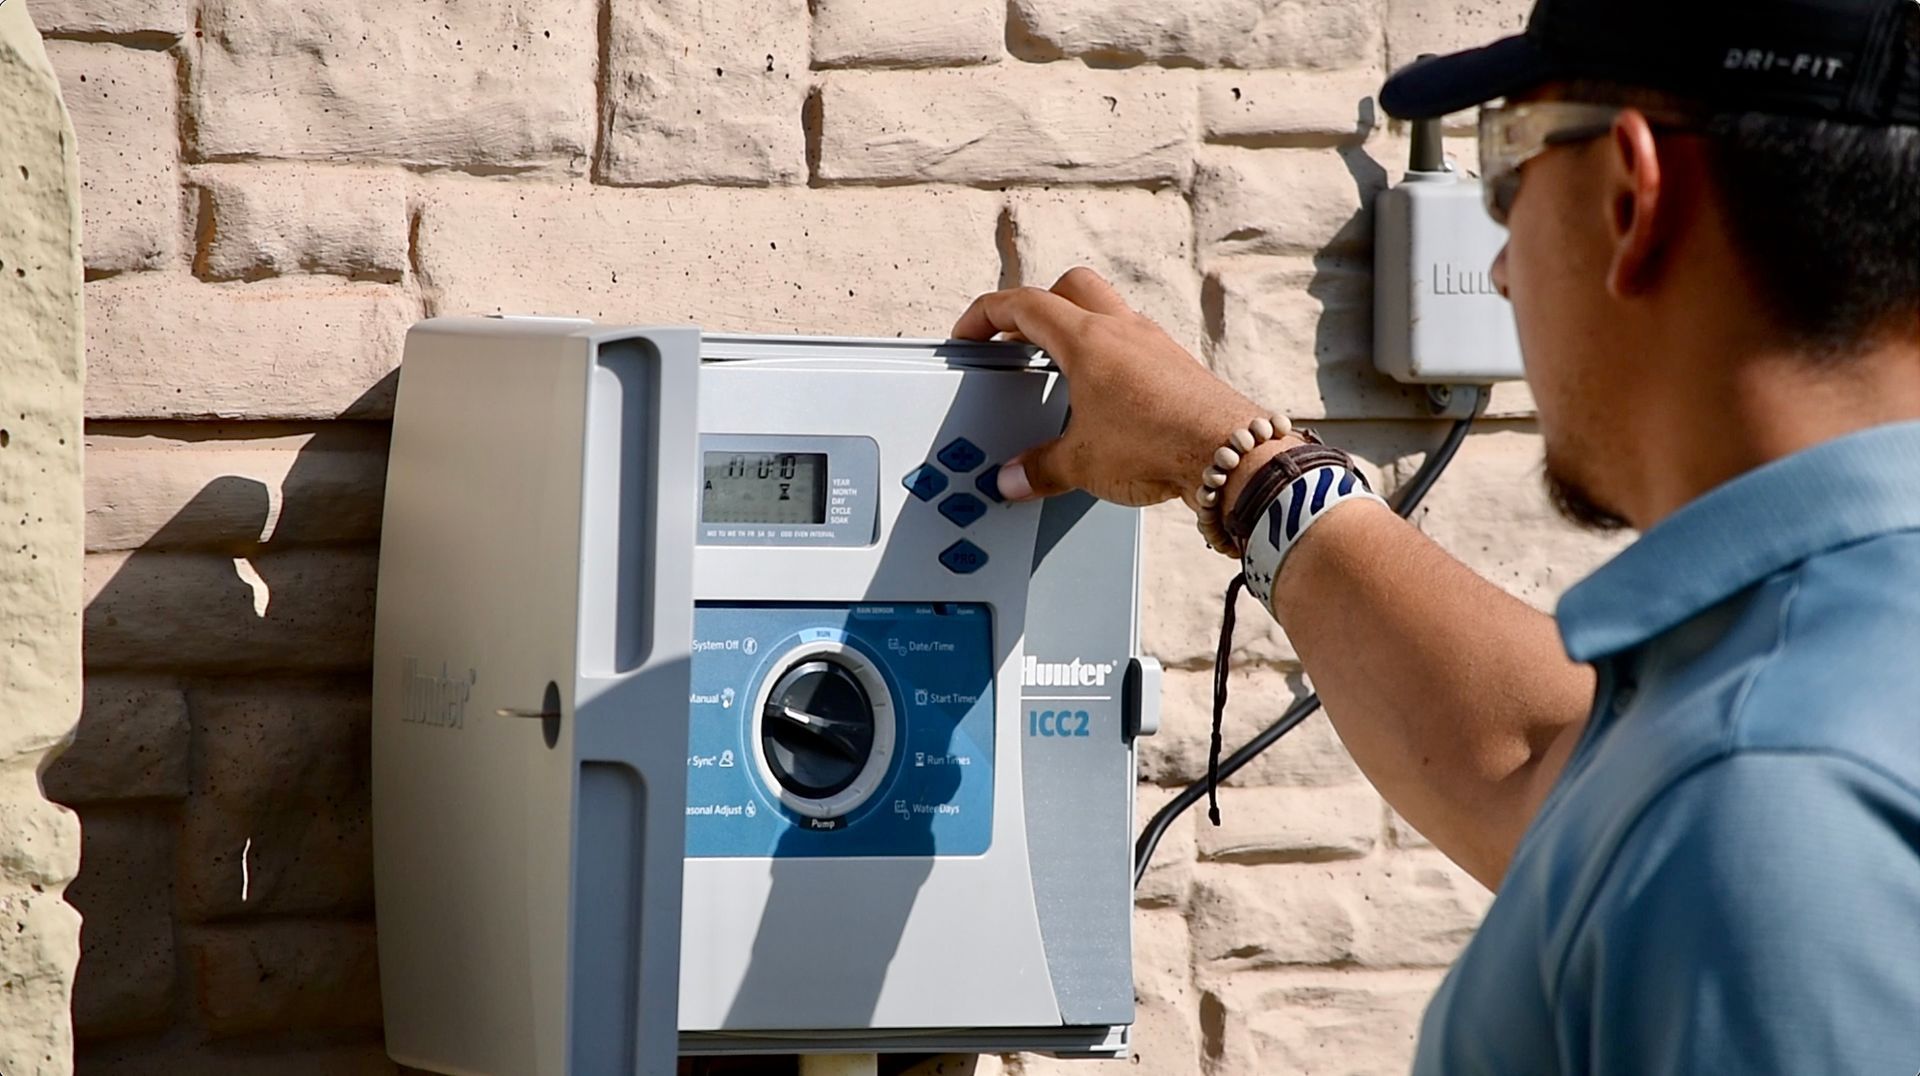
To set the date and time on the Hunter X2 controller, start by locating the "DATE/TIME" switch on the controller. It will be labeled and have a clock symbol. Press the "DATE/TIME" button to enter the date and time setting mode. Look for buttons with arrows or symbols that indicate "up" and "down". These buttons will help you adjust the values.
Press the "up" or "down" button to select the correct year. Keep pressing until you reach the right year. Next, choose the correct month by pressing the "up" or "down" button. Keep pressing until you reach the desired month. Then, select the specific day of the month using the "up" or "down" button. Keep pressing until you reach the correct day.
After setting the date, choose the current hour by pressing the "up" or "down" button. Continue pressing until you reach the right hour. Use the "up" or "down" button to set the current minute. Keep pressing until you reach the correct minute.
Once you have set the time, press the "DATE/TIME" button again to save your changes. Congratulations! You have successfully set the date and time on your Hunter X2 controller.
Remember, if you ever need to adjust the date or time in the future, simply follow these steps again. It's important to have the correct date and time on your controller to ensure accurate scheduling of your irrigation system.
Step 2: Set the Start Times
The "start time" is the specific time you want your irrigation system to begin watering your lawn or garden. It's like setting an alarm clock for your sprinklers to start working.
After setting the date and time as explained earlier, move the switch towards the "START TIME" option on the controller.
Now, using the "up" or "down" buttons, adjust the hour to the desired start time for your irrigation system. Press the right arrow to move on to "minutes"
After setting the hour, use the same "up" or "down" buttons to adjust the minutes. Keep pressing until you reach the desired minutes.
Once you have set the start time, press the appropriate button to confirm and save your changes.
By setting the start time, you can ensure that your irrigation system operates at the most suitable hours for your lawn and plants. This can help prevent water loss due to evaporation during the hottest parts of the day and allow for efficient water absorption by the soil.
Now you have successfully set the date, time, and start time on your Hunter X2 controller, which will contribute to maintaining a healthy and well-watered landscape.
Step 3: Set the Run Times
The "run time" refers to the duration or length of time that your irrigation system will water your lawn or garden during each watering cycle. It's important to set an appropriate run time to ensure that your plants receive sufficient water without wasting excess water.
To set the run times, follow these steps:
After setting the start time, move the switch towards the "RUN TIME" option on the controller. Now, using the "up" or "down" buttons, adjust the run time to the desired duration for your watering cycle. Keep pressing until you reach the desired hour, which should be set to "0". Press the right arrow to set the minutes, which should be around "10" minutes of run time. Once you have set the run time, press the right arrow to confirm and save your changes.
It's important to consider several factors when determining the appropriate run time for your irrigation system. These factors include the type of plants you have, the soil type in your garden, and the local weather conditions. Generally, most lawns require about 1 inch of water per week, including rainfall, so you can divide this amount across your watering cycles to determine the run time.
However, it's important to monitor your lawn and plants regularly to ensure they are receiving adequate water. If you notice signs of overwatering or under-watering, you can adjust the run times accordingly.
Now you have successfully set the date, time, start time, and run times on your Hunter controller. Let's move on to the next step!
Step 4: Set the Water Days
The "water days" refer to the specific days of the week when your irrigation system will operate and water your lawn or garden. This feature allows you to customize the watering schedule based on your landscape's needs and any local watering restrictions.
To set the water days on your, follow these steps:
Move the switch towards the "WATER DAYS" option on the controller.
Now, using the "up" or "down" buttons, select the desired days of the week for your watering schedule. We recommend Monday, Wednesday, and Friday. Press the appropriate button to confirm each selection. Once you have set the water days, press the appropriate button to confirm and save your changes.
Setting the water days allows you to establish a consistent and efficient watering schedule. It helps ensure that your lawn and plants receive water at the right intervals while preventing excessive water usage. These settings work together to create a customized and efficient irrigation schedule tailored to your landscape's specific needs.
Rain Sensor
We install a rain sensor with your Hunter controller as it helps conserve water by preventing unnecessary irrigation during or after rainfall. A rain sensor is a device that detects when it's raining and automatically shuts off your irrigation system. It's usually located on the
side roof of your garage. Ensure it's
well-mounted and unobstructed.
Bypass Switch
The "bypass" switch is a useful feature on the Hunter controller that allows you to manually override or bypass the programmed watering schedule. When the bypass switch is activated, the controller temporarily suspends the automatic watering cycles and allows you to manually operate the sprinklers.
The bypass switch is handy in situations where you may need to water your lawn or plants outside of the regular schedule or if you want to perform maintenance on your irrigation system. By activating the bypass switch, you have control over when and how the sprinklers operate, giving you flexibility and convenience.
To activate the bypass switch, simply locate the switch or button on the controller that is labeled "BYPASS" or "MANUAL". Press the switch to activate the bypass mode, and the controller will halt the automatic watering cycles. When you're ready to resume the programmed schedule, simply deactivate the bypass switch.
Regularly Monitor Your System
Regularly monitoring your irrigation system can help you catch any issues early on and prevent damage to your lawn and plants. Check your system regularly to make sure it's working properly, and don't hesitate to call in a professional if you notice any issues.
In conclusion,
Setting up and programming your Hunter irrigation controller doesn't have to be a complicated process. By following these simple steps and tips, you can keep your lawn and plants healthy and green all season long. Remember to adjust your schedule based on the weather, water deeply and infrequently, and regularly monitor your system to ensure it's working properly. With a little bit of effort and attention, you can enjoy a lush and beautiful landscape all year round.

Spanish Version:
Como nuevo propietario, configurar y programar tu controlador de riego Hunter puede parecer intimidante, pero no tiene por qué serlo. Con algunos pasos sencillos, podrás establecer tu horario de riego y mantener tu césped y plantas saludables y verdes durante toda la temporada.
Paso 1: Configurar la Fecha/Hora
Comienza por configurar la fecha y hora en el controlador Hunter X2. Busca el interruptor "FECHA/HORA" en el controlador, que estará etiquetado y tendrá un símbolo de reloj. Presiona el botón "FECHA/HORA" para ingresar al modo de configuración. Utiliza los botones con flechas o símbolos de "arriba" y "abajo" para ajustar los valores.
Selecciona el año correcto presionando el botón "arriba" o "abajo". Continúa presionando hasta alcanzar el año correcto. Luego, elige el mes correcto presionando el botón "arriba" o "abajo". Sigue presionando hasta alcanzar el mes deseado. A continuación, selecciona el día específico del mes utilizando el botón "arriba" o "abajo". Continúa presionando hasta alcanzar el día correcto.
Después de configurar la fecha, elige la hora actual presionando el botón "arriba" o "abajo". Sigue presionando hasta alcanzar la hora correcta. Utiliza el botón "arriba" o "abajo" para establecer los minutos actuales. Continúa presionando hasta alcanzar los minutos correctos.
Una vez que hayas establecido la hora, presiona nuevamente el botón "FECHA/HORA" para guardar los cambios. ¡Felicitaciones! Has configurado correctamente la fecha y hora en tu controlador Hunter X2.
Recuerda que si necesitas ajustar la fecha o la hora en el futuro, simplemente sigue estos pasos nuevamente. Es importante tener la fecha y hora correctas en tu controlador para garantizar una programación precisa de tu sistema de riego.
Paso 2: Configurar las Horas de Inicio
El siguiente paso es establecer la hora de inicio. La "hora de inicio" es el momento específico en el que deseas que tu sistema de riego comience a regar tu césped o jardín. Es como configurar una alarma para que tus aspersores comiencen a funcionar.
Después de configurar la fecha y la hora como se explicó anteriormente, mueve el interruptor hacia la opción "HORA DE INICIO" en el controlador. Ajusta la hora deseada para el inicio de tu sistema de riego utilizando los botones "arriba" o "abajo". Luego, ajusta los minutos utilizando los mismos botones. Una vez que hayas establecido la hora de inicio, presiona el botón correspondiente para confirmar y guardar los cambios.
Al establecer la hora de inicio, puedes asegurarte de que tu sistema de riego funcione en las horas más adecuadas para tu césped y plantas. Esto ayuda a prevenir la pérdida de agua debido a la evaporación durante las horas más calurosas del día y permite una absorción eficiente del agua por el suelo.
Ahora que has configurado la fecha, hora y hora de inicio en tu controlador Hunter X2, contribuirás a mantener un paisaje saludable y bien regado.
Paso 3: Configurar los Tiempos de Riego
El siguiente paso es establecer los tiempos de riego. El "tiempo de riego" se refiere a la duración o tiempo que tu sistema de riego regará tu césped o jardín durante cada ciclo de riego. Es importante establecer un tiempo de riego adecuado para garantizar que tus plantas reciban suficiente agua sin desperdiciarla. Para configurar los tiempos de riego, sigue estos pasos:
Después de establecer la hora de inicio, mueve el interruptor hacia la opción "TIEMPO DE RIEGO" en el controlador. Ahora, utilizando los botones "arriba" o "abajo", ajusta el tiempo de riego a la duración deseada para cada ciclo de riego. Continúa presionando hasta alcanzar la hora deseada, que debería ser "0". Presiona la flecha hacia la derecha para establecer los minutos, que deberían ser aproximadamente "10" minutos de tiempo de riego. Una vez que hayas establecido el tiempo de riego, presiona la flecha hacia la derecha para confirmar y guardar los cambios.
Es importante tener en cuenta varios factores al determinar el tiempo de riego adecuado para tu sistema de riego. Estos factores incluyen el tipo de plantas que tienes, el tipo de suelo en tu jardín y las condiciones climáticas locales. En general, la mayoría de los céspedes requieren aproximadamente 1 pulgada de agua por semana, incluyendo la lluvia, por lo que puedes dividir esta cantidad entre tus ciclos de riego para determinar el tiempo de riego.
Sin embargo, es importante monitorear regularmente tu césped y plantas para asegurarte de que estén recibiendo agua suficiente. Si notas signos de exceso o falta de riego, puedes ajustar los tiempos de riego en consecuencia.
Ahora has configurado correctamente la fecha, hora, hora de inicio y tiempos de riego en tu controlador Hunter. ¡Pasemos al siguiente paso!
Paso 4: Configurar los Días de Riego
El siguiente paso es establecer los "días de riego". Los "días de riego" se refieren a los días específicos de la semana en los que tu sistema de riego funcionará y regará tu césped o jardín. Esta función te permite personalizar el horario de riego según las necesidades de tu paisaje y cualquier restricción local de riego.
Para establecer los días de riego, sigue estos pasos:
Mueve el interruptor hacia la opción "DÍAS DE RIEGO" en el controlador.
Ahora, utilizando los botones "arriba" o "abajo", selecciona los días deseados de la semana para tu horario de riego. Te recomendamos elegir lunes, miércoles y viernes. Presiona el botón correspondiente para confirmar cada selección. Una vez que hayas establecido los días de riego, presiona el botón correspondiente para confirmar y guardar los cambios.
Al establecer los días de riego, puedes establecer un horario de riego consistente y eficiente. Esto ayuda a asegurar que tu césped y plantas reciban agua en los intervalos adecuados, al tiempo que previene un uso excesivo de agua. Estos ajustes funcionan en conjunto para crear un horario de riego personalizado y eficiente adaptado a las necesidades específicas de tu paisaje.
Recuerda que puedes realizar ajustes en tu programación según sea necesario, como cambiar los días de riego o los tiempos de riego, para adaptarse a las condiciones cambiantes del clima y las necesidades de tus plantas.
Además, es importante destacar dos características adicionales de tu controlador Hunter: el sensor de lluvia y el interruptor de bypass.
Sensor de Lluvia
El sensor de lluvia se instala junto con tu controlador Hunter para ayudar a conservar agua al evitar el riego innecesario durante o después de una lluvia. Este dispositivo detecta cuando está lloviendo y apaga automáticamente tu sistema de riego. Por lo general, se encuentra en el lado del techo de tu garaje. Asegúrate de que esté bien montado y sin obstrucciones.
Interruptor de Bypass
El interruptor de bypass es una función útil en el controlador Hunter que te permite anular manualmente o saltar el horario de riego programado. Cuando se activa el interruptor de bypass, el controlador suspende temporalmente los ciclos de riego automáticos y te permite operar los aspersores manualmente.
El interruptor de bypass es práctico en situaciones en las que necesitas regar tu césped o plantas fuera del horario regular o si deseas realizar mantenimiento en tu sistema de riego. Al activar el interruptor de bypass, tienes control sobre cuándo y cómo funcionan los aspersores, brindándote flexibilidad y comodidad.
Para activar el interruptor de bypass, simplemente localiza el interruptor o botón en el controlador que esté etiquetado como "BYPASS" o "MANUAL". Presiona el interruptor para activar el modo de bypass y el controlador detendrá los ciclos de riego automáticos. Cuando estés listo para reanudar el horario programado, simplemente desactiva el interruptor de bypass.
Monitorear Regularmente tu Sistema
Recuerda monitorear regularmente tu sistema de riego para detectar cualquier problema a tiempo y evitar daños en tu césped y plantas. Verifica que el sistema esté funcionando correctamente y no dudes en llamar a un profesional si notas algún problema.
En conclusión,
configurar y programar tu controlador de riego Hunter no tiene por qué ser un proceso complicado. Siguiendo estos sencillos pasos y consejos, podrás mantener tu césped y plantas saludables y verdes durante toda la temporada. Recuerda ajustar tu horario según el clima, regar profundamente y con menos frecuencia, y monitorear regularmente tu sistema para asegurarte de que esté funcionando correctamente. Con un poco de esfuerzo y atención, podrás disfrutar de un paisaje exuberante y hermoso durante todo el año.

Share


